So I made some good progress this week. I have all the bottom skins glued in place now, and this week I glued in the chine strips on each side of the board. The chine strip fits into notches I cut in the bottom outside corners of each rib. It acts as sacrificial meat to be sanded away on the rails and still have some structural strength there internally. below are some pictures that probably display this better than I can describe.


These are cross sections of the rail, with the end of the rib showing. The top pic just shows bead and cove strips being used, whereas the bottom is just square rail strips being used. So the chine strip is glued into the notches. Then the rails of the surfboard are built up from the bottom up around the curve of each rib by gluing in 1/4 inch by 1/4 inch strips of wood that run the length of the board. Each strip is glued on top of the previous and follows the curve of each rib. Then since, you don't want squared off corners on the bottom of your surfboard, you sand away some of the wood to create a bottom curve (seen in the top photo) (these photos are from Tree 2 Sea, and I did not create them or this idea).

Chine strips being glued into place
 Board trimmed up along the chine strips and looking good!
 Here you can see how the chine strips define the outline of the board. The chine strips are thicker up towards the front of the board where the rails will be softer, or more curved on the underside, and I therefore needed more meat to sand away up in that area. I just built up the chine strip in layers up in those areas.
 another view- the single concave in the tail can be seen here! psyched it worked out!
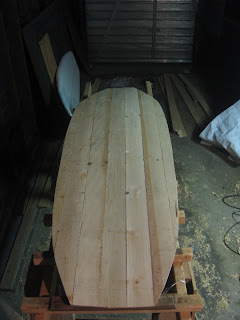 The underside of the board, roughly trimmed up
No comments:
Post a Comment