 Here's the skeleton on the rocker table I made. The rocker table has all the bottom contours built up so that the skeleton ribs and spine lay supported at each rib. The rocker table took longer than I expected, but it really adds support when gluing on the skins later on. The skeleton is just a spine and then ribs every 8 inches. I used 1/4 inch marine ply for this, as I'd read that is recommended because a) it's marine grade plywood, so it's ok if wet b) it is very high grade, so there's no possible gaps in the plywood layers that could turn into weak spots. I notched halfway through on each rib, and then the opposite half of the spine, and then they fit together. The holes are drilled in to take away some unnecessary weight and allow air to flow to each chamber in the board. If the board is in hot temperatures, the pressure will build inside it, so a vent is installed so the pressure can't build up. I don't know exact rules on how big the holes can be but based on photos I saw, I went a bit conservative on the size of my holes.
 Here's me making the backyard a mess. Thank you to our neighbor for never being bummed on me for taking it over.
 Another shot of the skeleton frame on the rocker table.
This weekend I glued on the first skins to the frame. The skins are basically skinny fence boards from Lowes. They are western red cedar, which is used for canoes and kayaks a lot because it is very weather/water resistant, has a high resistance to decay, and it's fairly light compared to it's strength. On top of that, it's local to the western USA and Canada, and is therefore ridiculously cheap ($1.50/board, and I need about 7 for the bottom of the board, 7 for the top). Since it's from Lowe's, there's plenty of warped, knotty, badly cut pieces, but with some lengthy picking and choosing, I've found a good amount that are nice pieces. The only thing is that they come in 5/8 inch thick pieces, and I need them to be 1/4 inch thick. So I have to splice them down the middle, and then use a planer to get it down to 1/4 inch thick. Not the most exact way to do it, but it's working, it just takes a while...
 I was super pumped to try out this steam bending technique I'd read about. This is very backyard and DIY looking as you can tell, nothing professional looking at all. So I used the camp stove outside, got a pot filled with water, and brought it to boiling. Then I put a board over the pot, with a hole cut in it and a can inserted into it. This way the steam coming from the boiling water only comes up out through the can. Then I made a long hollow box that the skins can fit into. I put wires through the box so that when I insert a skin, it is held up in the air, and not flat against the bottom of the box. The box has a hole cut into it that goes right over the can, so that the steam flows right into it. I steamed one board at a time, for about ten minutes. They come out all warm and flexy. By steaming them and then setting them in place on the frame and rocker table, the boards are easier to bend, and will then be set in the shape I put them in, and not want to go back to being straight boards.
 View down the can into the boiling water
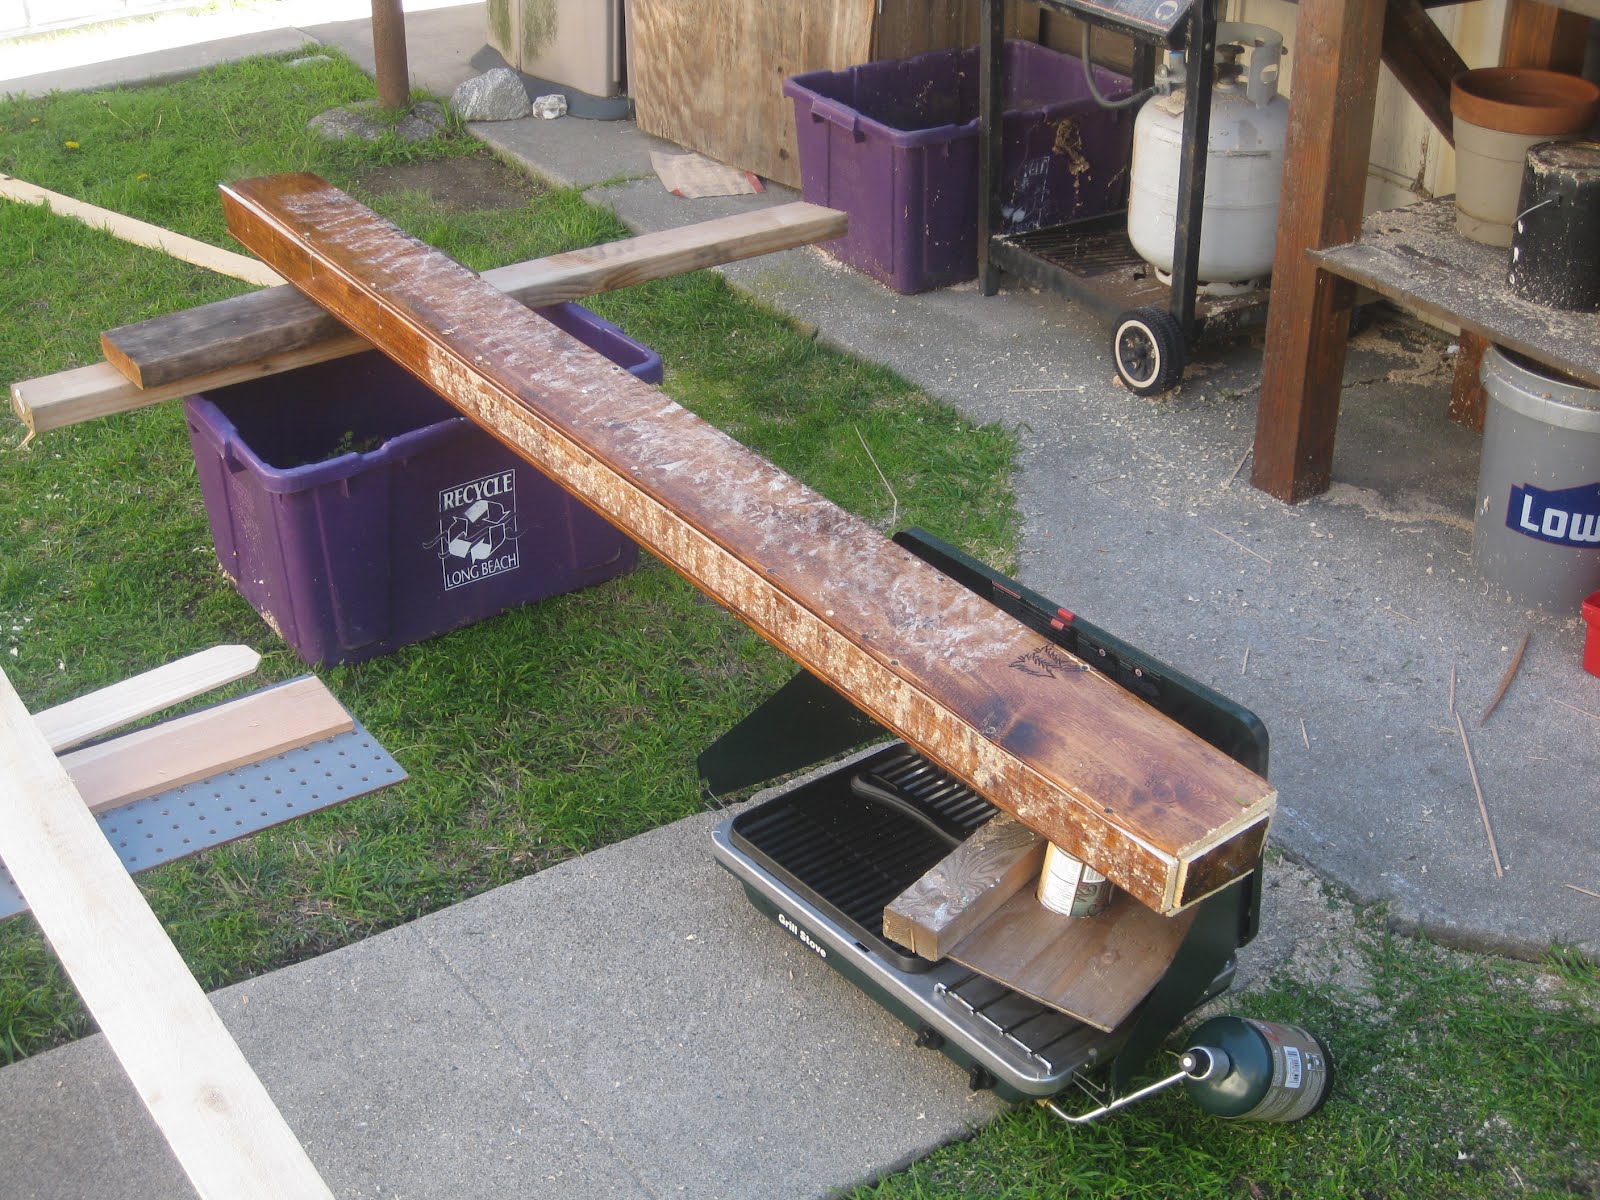 Box resting on can, wih the other end supported up a bit higher, so the steam flows up and out the small holes on the other end, getting to all parts of the board inside.
Once the board is steamed and ready, I put glue onto the frame, set the board in place on the rocker table, and then clamp and tie down everything as tight as possible. I used some plastic wrap I got from Lowe's also, as Wood Surfboard Supply had offered up this as a cheap alternative to buying lots of clamps. Here's a picture of the first skin in place. After 24 hours when the glue dries, I can release the clamps and tie-downs, pick up the frame, and then steam the next skin, and put on the rocker table in the right place, and glue the frame down onto it, clamping it all in place again. This weekend, I got the first three skins on, so about 14 inches are covered on the bottom. So far they are going together pretty nicely and smoothly, but it's slightly stressful making sure all cracks are butted up against each other as much as possible, everything is aligned properly, everything is pulled down and flush with the rocker table. But yea, super super pumped that I can see it coming together now! More to come
No comments:
Post a Comment